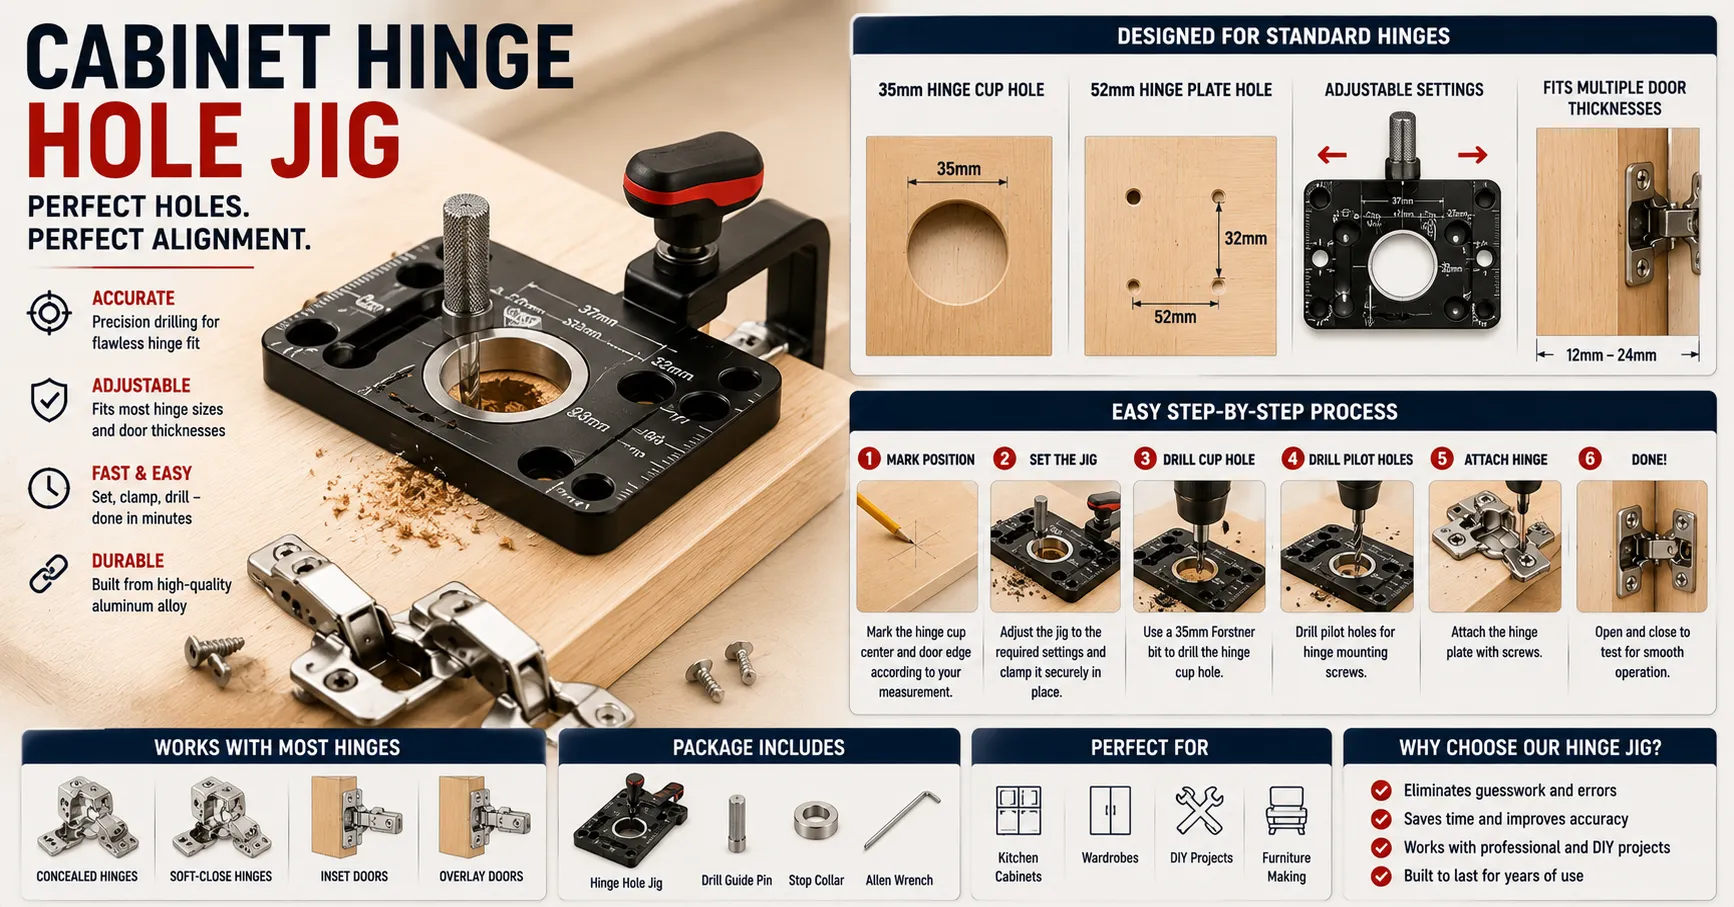
If you are installing concealed hinges on several cabinet doors, getting every hinge hole in exactly the same position can be difficult when measuring and drilling by hand. A cabinet hinge hole jig provides a repeatable drilling guide that helps position the hinge cup and related holes consistently. This is especially useful when installing European-style concealed hinges, where the cup diameter, edge distance, hole depth, and mounting position all need to work together. A jig can reduce measuring errors, improve consistency between doors, and make repetitive cabinet work much faster. However, not every jig fits every hinge. Before purchasing one, check the hinge cup diameter, required offset, door thickness, drilling depth, and hinge manufacturer’s specifications. The right jig should match your hardware rather than simply being advertised as a universal cabinet hinge jig.
Quick Answer
A cabinet hinge hole jig is a drilling guide used to position and drill cabinet hinge holes accurately.
For many concealed cabinet hinges, the jig guides a drill bit or Forstner bit to create the hinge cup hole in the correct location. Some jigs also help position the screw holes.
A good jig can help you maintain the same:
- Cup-to-edge distance
- Hole position
- Hinge spacing
- Drilling angle
- Drilling depth
The most important thing is compatibility. If your hinge requires a 35 mm cup, for example, the jig must support that specification.
If you are starting from scratch, first read our guide on how to drill cabinet hinge holes so you understand the measurements that the jig is designed to control.
You Need Consistent Hinge Hole Position
One of the biggest reasons to use a cabinet hinge hole jig is consistency.
When you measure every door manually, even a small difference can change the position of the hinge. If one hinge is several millimeters higher or lower than another, the doors may not line up properly.
This becomes especially noticeable when installing several cabinet doors next to each other.
A jig creates a repeatable reference point, allowing you to position the hinge hole at approximately the same location on each door.
Simple Test
Take two cabinet doors that were drilled manually.
Measure the distance from the door edge to the center of each hinge cup.
If the measurements are noticeably different, inconsistent marking may be contributing to alignment problems.
A jig can help eliminate this variation.
Manual Drilling Can Produce Uneven Holes
Even when the measurement is correct, drilling can still create problems.
If a handheld drill is tilted slightly, the hinge cup may not sit correctly in the door. An uneven or angled hole can make the hinge difficult to install and may affect door alignment.
A suitable hinge jig provides a physical reference that helps keep the drilling location consistent.
However, the jig does not automatically guarantee perfect results. The door still needs to be secured, the correct drill bit must be used, and drilling depth must be controlled.
Simple Test
After drilling the hole, place the hinge cup into it without fully tightening the screws.
Check whether:
- The cup sits evenly.
- The hinge is not tilted.
- The cup is not excessively loose.
- The hinge sits at the intended depth.
If the hinge sits at an angle, check the drilling method and jig setup before drilling another hole.
You Are Drilling Multiple Cabinet Doors
A hinge jig becomes particularly useful when several doors require identical hinge positions.
Manually measuring one door is manageable. Measuring 10, 20, or 30 doors while maintaining identical dimensions is much harder.
A jig lets you establish a reference position once and repeat it.
This can save time while improving consistency across a cabinet installation.
Before drilling multiple doors, however, test the jig on a scrap piece or spare door.
This is much safer than discovering after drilling several doors that the jig was incorrectly configured.
Simple Test
Use the jig on two scrap pieces of the same thickness.
Drill both hinge holes and compare their positions.
Measure:
- Distance from the edge
- Hole diameter
- Hole depth
- Center position
If the measurements match, the jig is providing the repeatability you need.
Manual Measurement Increases the Risk of Positioning Errors
A concealed hinge requires more than simply drilling a hole in the center of the door.
The hinge position is affected by the door edge, hinge cup dimensions, overlay, mounting plate, and cabinet construction.
If you use the wrong reference point, the hinge may technically fit but the finished door may sit too high, too low, too far inward, or too far outward.
This is why understanding overlay is important before setting up a jig.
Our guide explains what overlay means on a cabinet hinge, while our guide on how to measure cabinet hinge overlay explains the measurement process.
Simple Test
Before drilling, mark the intended hinge centerline manually.
Then position your jig over the same reference point.
If the jig’s guide position does not correspond with your measurements, stop and verify the jig’s settings.
Do not assume the jig’s default position will automatically match your hinge.
Best Solution
The best solution is to choose a cabinet hinge hole jig based on your actual hinge specifications.
Before buying one, identify:
1. Hinge Cup Diameter
Many concealed hinges use a 35 mm cup, but this is not universal.
Check your hinge specifications before purchasing the jig.
2. Cup-to-Edge Distance
The distance between the hinge cup and the door edge is critical.
A jig with an incorrect fixed offset can put the hinge in the wrong position.
3. Door Thickness
Make sure the jig and drilling method are appropriate for your cabinet door thickness.
Thin doors require particular attention to drilling depth.
4. Drilling Depth
A depth stop can help prevent the drill from going too deep.
Never assume that the maximum drilling depth is safe for your particular door.
5. Hinge Type
Determine whether you are installing a concealed European hinge, face-frame hinge, frameless hinge, or another design.
6. Mounting Holes
Some jigs only guide the hinge cup. Others also provide guides for the hinge mounting screws.
Know what your jig actually supports.
How to Use a Cabinet Hinge Hole Jig
Once you have confirmed compatibility, follow a controlled process.
Step 1: Measure the Cabinet Door
Record the door thickness and determine the required hinge positions.
Step 2: Confirm the Hinge Specifications
Check the hinge cup diameter, depth, edge offset, and mounting-hole requirements.
Step 3: Set the Jig
Adjust the jig according to the hinge manufacturer’s measurements.
Do not automatically use the jig’s default settings.
Step 4: Secure the Jig
Clamp or hold the jig firmly against the cabinet door.
It should not move while drilling.
Step 5: Drill the Hinge Cup Hole
Use the correct bit and maintain controlled drilling pressure.
For many concealed hinges, a Forstner-style bit is commonly used, but the diameter must match the hinge specification.
Step 6: Control the Depth
Use a depth stop or another reliable method to prevent drilling too deeply.
Step 7: Test the Hinge
Insert the hinge cup into the hole.
Check that it sits correctly before tightening the screws.
Step 8: Install the Hinge
Secure the hinge according to the manufacturer’s instructions.
Step 9: Install the Cabinet Mounting Plate
Attach the matching mounting plate to the cabinet.
Step 10: Adjust the Door
After installation, small adjustments may be necessary.
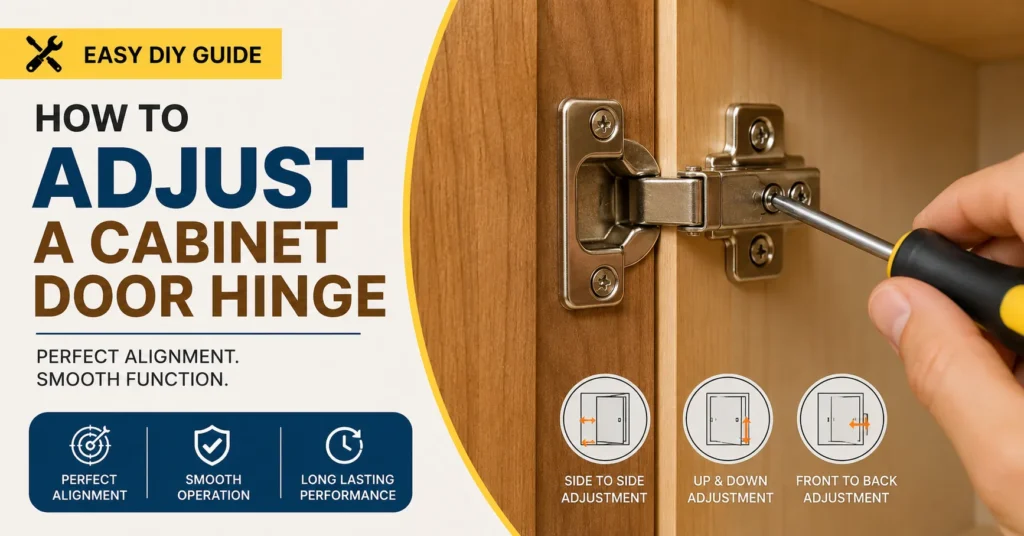
Our guide on how to adjust cabinet door hinges can help correct common alignment problems.
What If the Jig Still Produces Bad Results?
If the hinge holes are consistently wrong, do not immediately blame the drill.
Check the complete setup.
First, verify the hinge dimensions.
Second, verify the jig’s offset.
Third, check whether the jig is designed for your specific hinge system.
Fourth, confirm that the drill bit is the correct diameter.
Finally, make sure the jig is not moving during drilling.
If your cabinet doors have already been drilled incorrectly, additional drilling may make the problem worse. In that situation, assess whether the hole can be repaired before making another modification.
When Professional Repair/Replacement Makes Sense
A professional repair may be appropriate when:
- The hinge hole was drilled in the wrong location.
- The hole is significantly oversized.
- The door is very thin.
- The door material is cracked.
- Multiple doors have incorrect hinge positions.
- Expensive cabinetry is involved.
- The hinge system is unusual.
- The cabinet material is damaged around the mounting area.
If the cabinet hinge mounting area has failed rather than the door itself, a repair plate may be a better solution.
For example, you can compare a cabinet hinge repair plate or cabinet hinge reinforcement plate before replacing the entire cabinet door.
Recommended Replacement
If you need a jig for installing concealed cabinet hinges, Amazon has several options:
Browse Cabinet Hinge Hole Jigs on Amazon
When comparing products, look for:
- 35 mm hinge compatibility if required
- Adjustable edge offset
- Depth-control capability
- Stable construction
- Accurate drilling guides
- Compatibility with your drill bit
- Suitable door thickness
- Clear measurement markings
- Replacement parts where applicable
- Avoid choosing a jig simply because the listing says “universal.”
Check whether the jig actually supports your hinge’s cup diameter, edge distance, and drilling requirements.
If you frequently install concealed hinges, a repeatable jig can be more useful than manually measuring every door.
Common Mistakes to Avoid
Using the Wrong Cup Diameter
A 35 mm jig is not automatically suitable for every concealed hinge.
Ignoring the Edge Offset
Correct cup diameter with incorrect edge positioning can still produce a bad installation.
Not Securing the Jig
A jig that moves during drilling can create inaccurate holes.
Drilling Too Deep
Always control the drilling depth, especially on thin doors.
Skipping a Test Door
Test the setup before drilling expensive or finished cabinet doors.
Assuming the Jig Fixes Everything
A jig improves repeatability, but it cannot compensate for incorrect hinge selection or wrong measurements.
FAQ
Q: What is a cabinet hinge hole jig?
A: A cabinet hinge hole jig is a drilling guide that helps position and drill concealed cabinet hinge holes consistently.
Q: Do I need a jig to install cabinet hinges?
A: No, but a jig can make repetitive hinge installation faster and more consistent, especially when installing several cabinet doors.
Q: Are cabinet hinge jigs universal?
A: No. Different jigs support different hinge cup diameters, offsets, drilling depths, and hinge systems.
Q: Is a 35mm hinge jig suitable for every concealed hinge?
A: No. Many concealed hinges use 35 mm cups, but you should always verify your specific hinge dimensions before purchasing a jig.
Q: Can I use a hinge jig with a hand drill?
A: Many hinge jigs are designed to work with a handheld drill, but the exact setup depends on the jig and drill-bit design.
Q: Can a hinge jig fix an incorrectly drilled hole?
A: Usually not. A jig is designed to help create a correctly positioned new hole. An incorrectly drilled hole may require a repair or replacement solution.
Final Thought
A cabinet hinge hole jig is most valuable when accuracy and repeatability matter. Instead of manually measuring and marking every cabinet door, the right jig can provide a consistent reference for hinge-cup placement and reduce common drilling errors. The key is choosing a jig that matches your hinge. Confirm the cup diameter, edge offset, door thickness, drilling depth, and hinge design before ordering. Then test the setup on scrap material before drilling the finished cabinet door.
If the hinge holes are already damaged or incorrectly positioned, stop drilling and determine whether the door or mounting area needs repair. For a straightforward installation, however, a properly matched jig can make concealed hinge installation significantly easier and more consistent.